


前言
這系列的筆記會省去一堆基礎的程序實作, 程序碼亦會因為不同版本或為了新功能而修改,但核心的功能及實作時遇到的問題跟解法則會較詳細的記錄下來.
使用環境假設
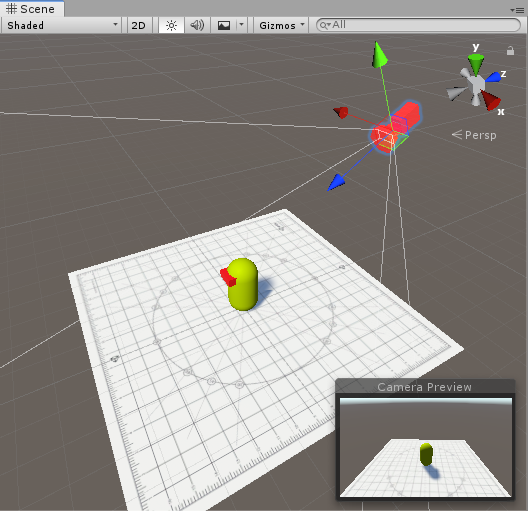
本篇不談論鏡頭的配置, 但是 Locomotion 是建基於在第三身視點下進行的個人遊戲來說明的, 一般的設定下看起來像這樣的,
- 紅色的是鏡頭 Camera,
- 黃色的是我們的玩家代表物, , 上面紅格是正前向的方向代表.
這類形的鏡頭有以下的設計特點
- 在大部分時間 玩家代表物的方向 與 鏡頭方向不一致
- 頭會因應很多原因而改變, 也因此會影響玩家輸入的方式.
- 玩家普遍要求動作類遊戲的反應是一按下去立即進行.
所以 Locomotion 是甚麼?
所謂的 https://whatis.techtarget.com/definition/locomotion 在人物操作上就是一個混集了「基礎」移動的動畫合集.
例:
- 靜止
- 步行
- 跑步
Unity3D 裡其實滿多範例解說的, 但其實 Unity 本身的範例有學習研究透徹的就會做出差不多這樣的圖.
關於這個圖代表的概念 詳閱 Animator – Blending 一文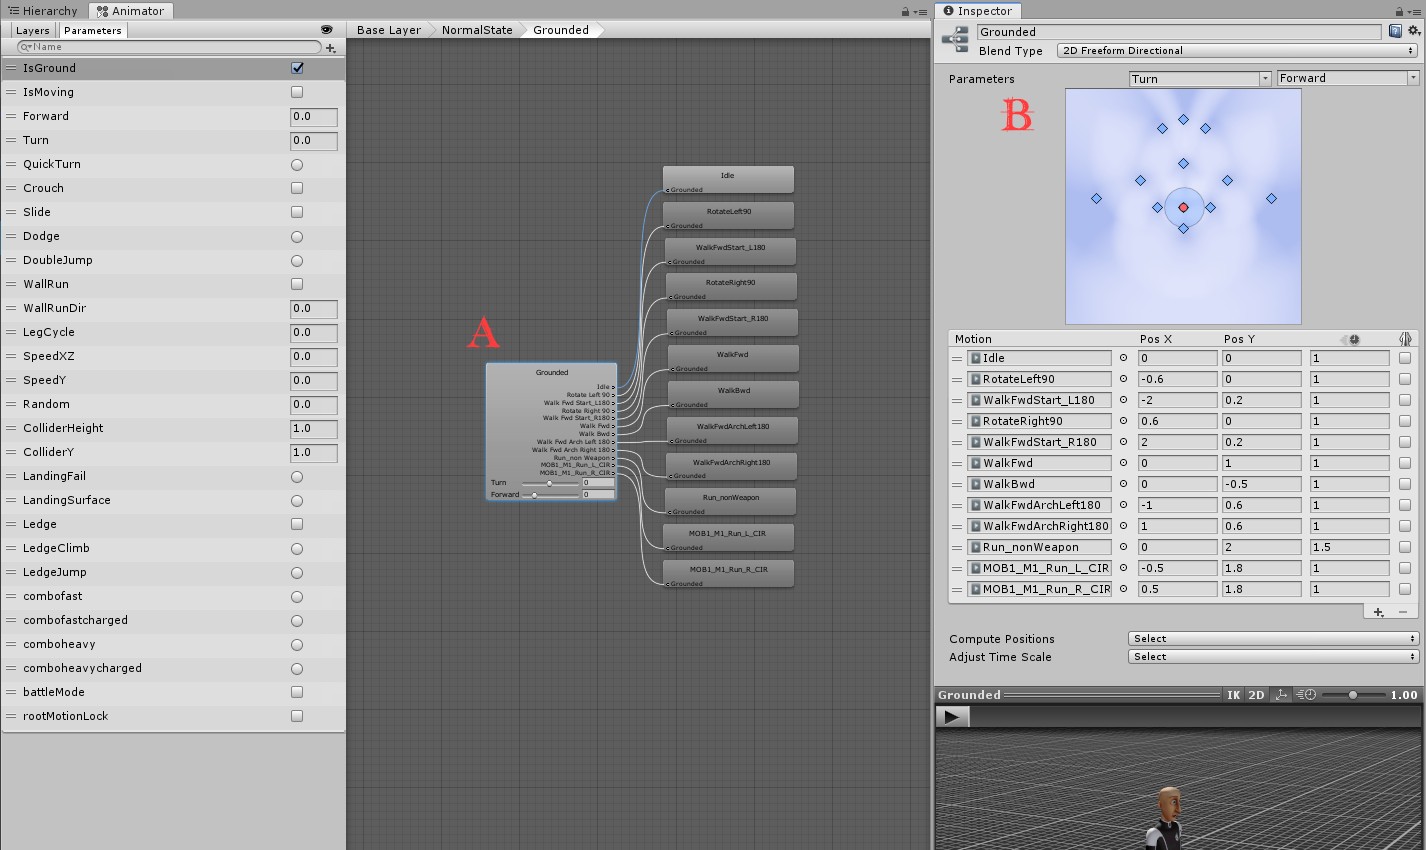
方向?判斷玩家想去甚麼地方?
這是決定你的遊戲系統最要命的細節, 玩家 99%也是透過操作來跟遊戲互動,
那麼以先前的假設來說就有一個問題要考慮.
若然當下你玩家按下鏡頭控制扞, 鏡頭在進行以下的運鏡,
第一身視點的操作
以第一身視點的操作, 因為人物跟鏡頭方位永遠一致, 所以.
- 控制扞 { 上, 下 } 代表人物的 { 前進, 後退 }
- 控制扞 { 左, 右 } 代表人物的 { 左移, 右移 }
// convert 2D input into 3D direction, based on character current transform.
float horizontal = Input.GetAxis("Horizontal");
float vertical = Input.GetAxis("Vertical");
Vector3 direction = (transform.right * horizontal) + (transform.forward * vertical);
第三身視點的操作
但在 3D 人物背後操縱時一般會把上面的 transform.forward / right 改為鏡頭(Camera)的方向,
因為玩家是以看到的畫面來決定人物的移動方位的, 就是所謂更直觀的操作方式.
e.g. 如下圖由右上角移到左下方.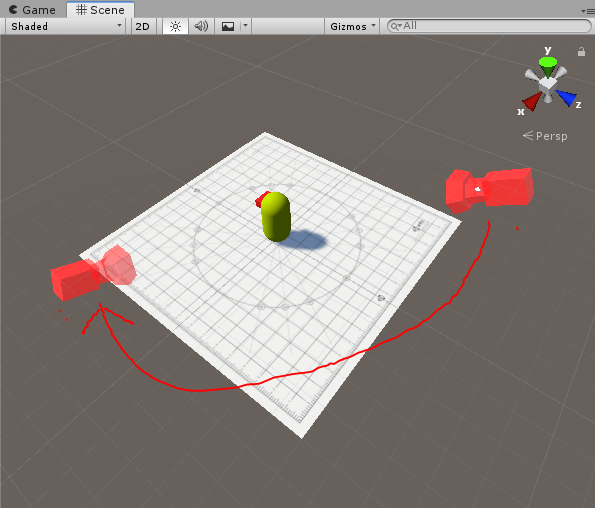
看到的影像..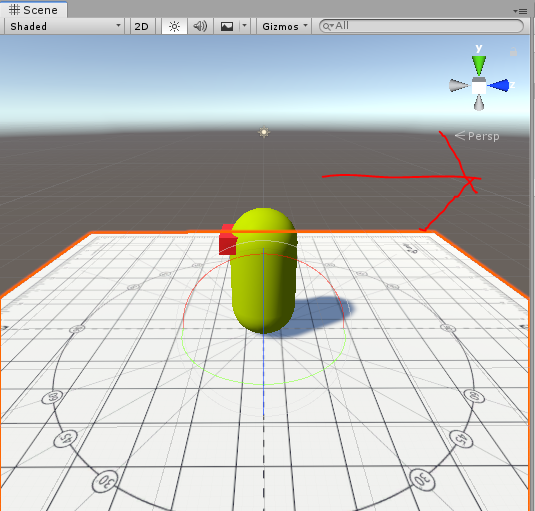
而在這個時候玩家按下移動控扞的 右方, 人物應該住甚麼地方移動?!
以上圖所見玩家所按下的 “右方” 其實是角式的 “後方”
那麼, 以上面的例字來說明第三身操作的輸入關鍵就是鏡頭本身的 Transform.
再精簡的說一次, 第三身視點方式要做的步驟其實是.
- 當玩家按下方向鍵 “右” 的時候, 從鏡頭的 “右” 方 (Local direction) 找到世界的指向 (World direction)
- 再把這個 World direction, 以玩家的個人空間為準換算出是角式的 “後” 方.
達成步驟 1)
先取得鏡頭的坐標並以地面為其準做投影取得地面的兩個方向參考 vector3
// based on avatar current standing plane, to calculate the cameraForward.
public Vector3 CameraForwardOnPlane => Vector3.ProjectOnPlane(Camera.main.transform.forward, transform.up).normalized;
public Vector3 CameraRightOnPlane => Vector3.ProjectOnPlane(Camera.main.transform.right, transform.up).normalized;
留意上面取得的 CameraForwardOnPlane & CameraRightOnPlane 是一支距離為 1f 的 normalized vector.
而因為 1 的特性是乘以任何數值 e.g. 1f * x = x 的結果.
我們保留這兩支 vector 作為方向指標.
然後就是讀取玩家 2D 的輸入把這數值以這兩支 vector 計算.
按 :
 // Convert 2D input into 3D local direction
float Horizontal = Mathf.Clamp(Input.GetAxis("Horizontal"), -1f, 1f);
float Vertical = Mathf.Clamp(Input.GetAxis("Vertical"), -1f, 1f);
Vector3 worldDirection = (Horizontal * CameraRightOnPlane) + (Vertical * CameraForwardOnPlane);
說明一下 GetAxis(“Horizontal”) & GetAxis(“Vertical”), Horizontal 跟 vertical 是 U3D 預設的方向鍵
讀取的就是 2 組有正,負範圍的值.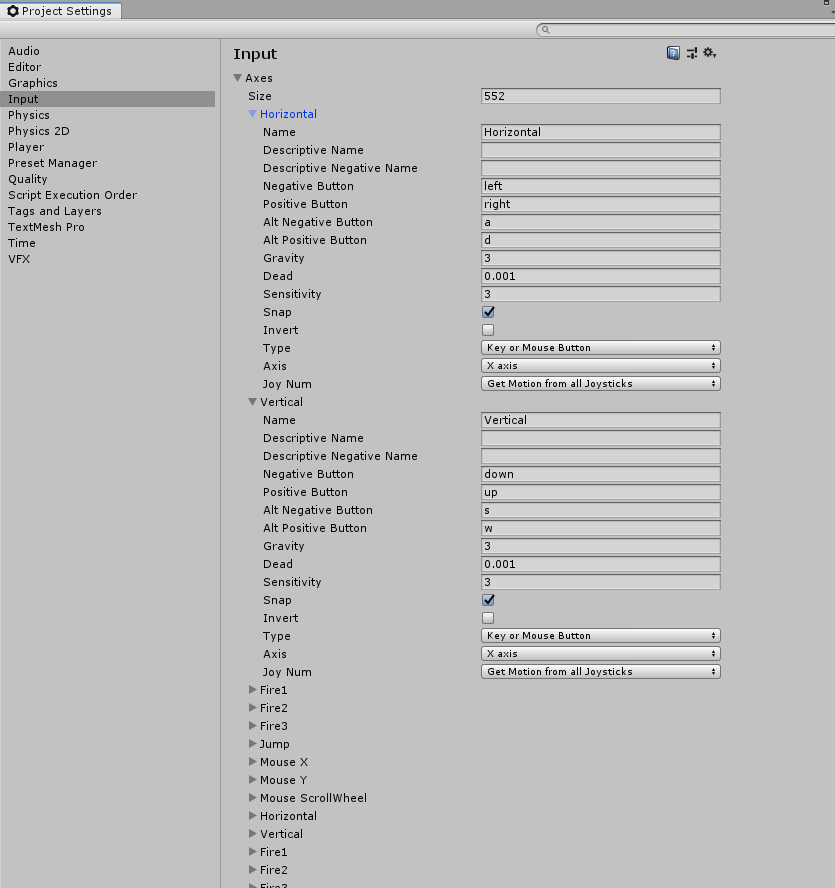
所以只需要把數值乘上先前的地面投影, 即可取得一支 world direction的向量, 來代表玩家希望人物往該方向走動.
計算人物移動就用這支 “worldDirection”, 的矢量來運算出移動方向.
float maxSpeed = 3f;
transform.position += WorldDirection * (maxSpeed * Time.deltaTime); // 現在的地點, 向世界方向移動這個距離.
如果不理解 maxSpeed * Time.deltaTime 為甚麼是距離的話找搜一下 “speed time distance“
“WorldDirection” 是一支長度 <= 1f 的矢量,用以代表使用者的輸入強度.
就這樣加上現在的地點就可以得出下一幀該出現的地點. 還是不明白的同學要再溫習一次 Vector
移動可以了,但動作怎樣處理?
這時候我們就利用內建的 API 來做簡單的世界坐標 -> 個人坐標的轉換.
public Transform playerTransform; // assume it's assigned in inspector!
/////////
void Update()
{
    Vector3 localDir = playerTransform.InverseTransformVector(worldDirection); // world -> local
    animator.SetFloat("MoveX", localDir.x);
    animator.SetFloat("MoveY", localDir.z); // Z not Y
}
假設前面的 Animator 已經設定好 Blending 的話, 到此應該可以建構到一個簡單能跑的人形.
不明白的同學要回去好好想想世界坐標跟個人坐標的問題 :
e.g. 您自己的前方, 跟 世界的北方 之間的關係.
總括一下上面的代碼大既就是.
public float maxSpeed = 3f;

// based on avatar current standing plane, to calculate the cameraForward.
// Caution : Camera.main are costly API call(GameObject.Find + tags matching), consider cache result per frame.
public Vector3 CameraForwardOnPlane => Vector3.ProjectOnPlane(Camera.main.transform.forward, transform.up).normalized;
public Vector3 CameraRightOnPlane => Vector3.ProjectOnPlane(Camera.main.transform.right, transform.up).normalized;

private void Update()
{
     // Convert 2D input into 3D local direction
    float Horizontal = Input.GetAxis("Horizontal");
    float Vertical = Input.GetAxis("Vertical");
    Vector3 worldDirection = (Horizontal * CameraRightOnPlane) + (Vertical * CameraForwardOnPlane);

    // Optional : to prevent out of range on some device
    worldDirection = Vector3.ClampMagnitude(worldDirection, 1f);

    // Move
    // if (worldDirection.sqrMagnitude > 0.01f) // Option B, when length of vector are represent the movement distance
    if (worldDirection != Vector3.zero)
    {
        transform.position += worldDirection * (maxSpeed * Time.deltaTime);
        transform.forward = worldDirection;
    }

    // An update animator parameters
    Vector3 localDir = transform.InverseTransformVector(worldDirection); // world -> local
    animator.SetFloat("MoveX", localDir.x);
    animator.SetFloat("MoveY", localDir.z); // Z not Y
}
Pingback: 便當級的怪物 Locomotion + NavMeshAgent – Clonefactor
Pingback: 我的人形開發筆記(四) Locomotion, 被障礙物影響的移動. – Clonefactor
Pingback: Local / World Space 空間 – Clonefactor
Pingback: Make Locomotion look good in Unity3D – Clonefactor